


A Caravan pilot I know had a sobering experience departing Ukiah one cloudy, rainy day. Like many smaller airports, Ukiah does not have a charted instrument departure procedure. Instead, there is a textual description called an Obstacle Departure Procedure or ODP . An ODP may include recommended takeoff minima (ceiling and visibility) and though these minima do not apply to pilots operating under Part 91, GA pilots should take these minima into consideration. The ODB may also include minimum climb gradients (given in feet per nautical mile) as well as which runways are authorized for departure and which are not. Your aircraft should be capable of meeting any climb gradient specified, unless you think you can maintain visual conditions to a safe altitude. If no climb gradient is specified, a standard 200 feet per nautical mile gradient is assumed.
The Ukiah Municipal Airport has ODP you want to follow carefully if departing IFR because there is plenty of cumulous granitus to run into. Here's the ODP for Ukiah.

What happened to the pilot I mentioned is that his slaved heading indicator failed shortly after takeoff. Lucky for him, his aircraft was equipped with a vacuum-driven heading indicator on the right instrument panel and he, unlike some pilots, always set it to the runway heading right before takeoff. A magnetic direction indicator is required equipment for both IFR and VFR, and for good reason. Yet in a climb or descent, a magnetic compass can be difficult to read and may not be very accurate, so most aircraft are equipped with gyroscopic or slaved heading indicators that pilots refer to when climbing, descending, or turning.
A useful backup technique in a GPS-equipped aircraft when an ODP calls for a particular heading after takeoff, is to select your departure airport from your flight plan as the current waypoint and use the OBS feature.
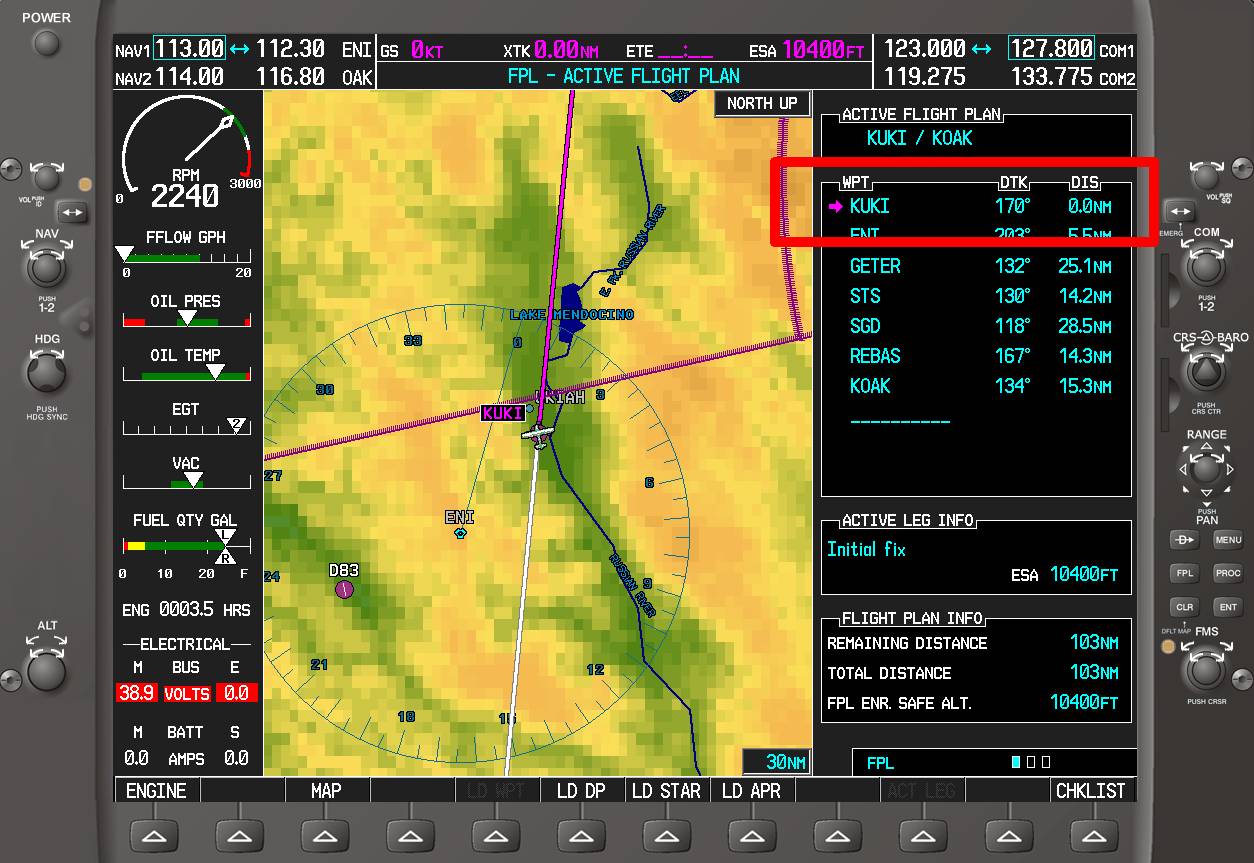
Highlight the airport in the flight plan and press the Direct-To button. Next press the OBS button and use the course knob to set the desired course to track from the airport. Be careful if you're using a G1000 because the course knob is located very close to the knob used to set the barometric pressure for the altimeter. With a Garmin 430/530 or G1000, I'd set a course to the airport so that the course I want to track appears in magenta, just like the active course would appear normally. Do not use the NAV mode on your autopilot if you use this technique: You must hand fly the departure or use your autopilot in heading mode.

After takeoff and passing 400' AGL (or the altitude specified in the ODP), turn to your heading. In this example, you'd turn right to a heading of 350˚ after reaching about 1100 feet.

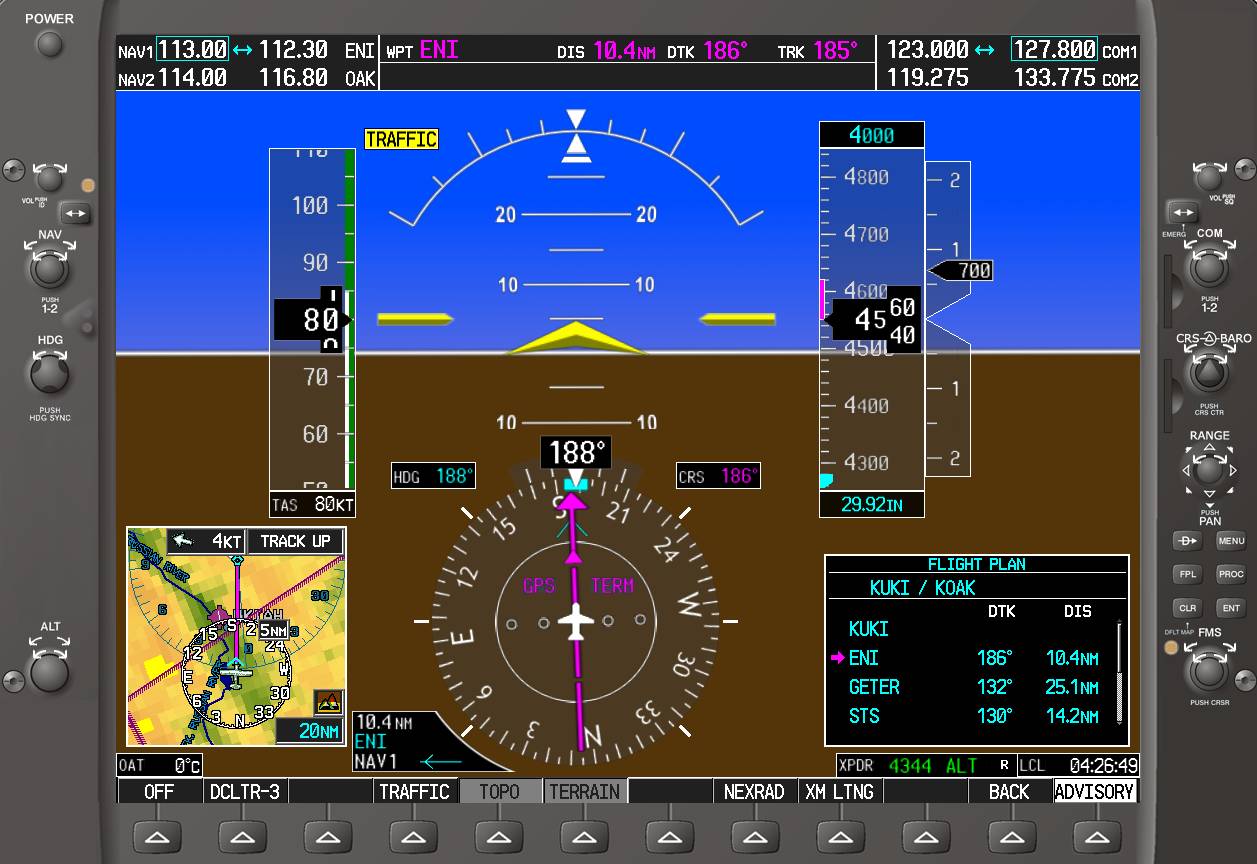
As you approach 4000 feet, highlight the Mendocino VOR waypoint in your flight plan and press the Direct-To button. Then turn left and proceed direct to the VOR as you continue your climb.
This brings up a couple of beefs I have mentioned with the G1000 design. Anytime you select the Flight Plan on either the Primary Flight Display or Multi-Function Display and enter cursor mode by pressing the small knob, the window scrolls to the end of the flight plan and highlights a blank line. This is gets old very quickly since 99% of the time you want to select a waypoint very near your current waypoint, not add waypoints to the end of the flight plan. Interestingly, the Garmin 430 and 530 don't exhibit this behavior - they keep the cursor right on your current waypoint.
My other complaint is that the flight plan inset window on the PFD disappears unexpectedly. I often enter cursor mode and highlight a waypoint so I'll be ready to proceed direct to that waypoint when ATC clears me to do so. As soon as you press the Direct-To button, the inset flight plan window just vanishes. If you want to get it back so you'll be prepared to go to another waypoint, you must press the FPL button, press the small knob to enter cursor mode (which scrolls automatically to the end of the flight plan), then use the large knob to scroll back up to the desired waypoint. Oh, and don't try scrolling with the small knob you pressed to enter cursor mode because that will insert a waypoint. Make this mistake and you'll have to do even more button pushing to recover. Sheesh! No wonder it takes 8 to 10 hours for most pilots to become IFR proficient with the G1000.
In spite of its warts, the G1000 provides excellent situational awareness and does a lot to enhance safety of flight. Just be sure you do a RAIM check prior to takeoff and be careful which buttons you push and which knobs you turn.


